If you want to lengthen your nails quickly because they are difficult to lengthen, or if you want to lengthen just one broken nail, there is a method called “lengthening” using gel or acrylics.
This time, we will introduce the easiest method among the various types of lengthening methods!
I think this is the easiest way for beginners to self-nail their nails, so please give it a try.
*This blog is written by a manicurist in Japan. The information contained in this article is available in Japan. Please note that it may be different in other countries.
What you need for length
In this article, we will show you how to use a halfway tip for lengthening. Here’s what you’ll need!
halfway chip
A halfway tip is a type of tip that is applied from about halfway up your own nails. It blends in better with your own nails and feels less uncomfortable than the type that is applied to the entire nail.
The tips we used this time were Capri’s “Ultra C Curve Tips (Natural),” which are hard to find unless you go to a nail wholesaler or other specialty store.
So you can just search for “half tip nail tips” on the Rakuten market and use what comes up, which is this kind of thing ⇓.

Some halfway tips have a thinner “contact zone” where the tip adheres to your nails, but I recommend the type without the contact zone (although it is best to try it out to see which you like better, since you have your own preferences!)
glue
It is used to apply the tips to your own nails. Brush type is the best.
Activator (quick-drying agent)
A quick-drying agent that dries glue quickly. It is convenient to have it, but it is OK without it.
nail file
A nail file used to scratch your own nails and shape tips. 150G or 180G is recommended.
Sponge Buffers
Sponge buffer used to prepare the shaved area.
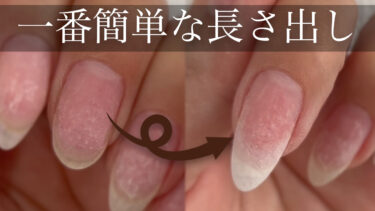
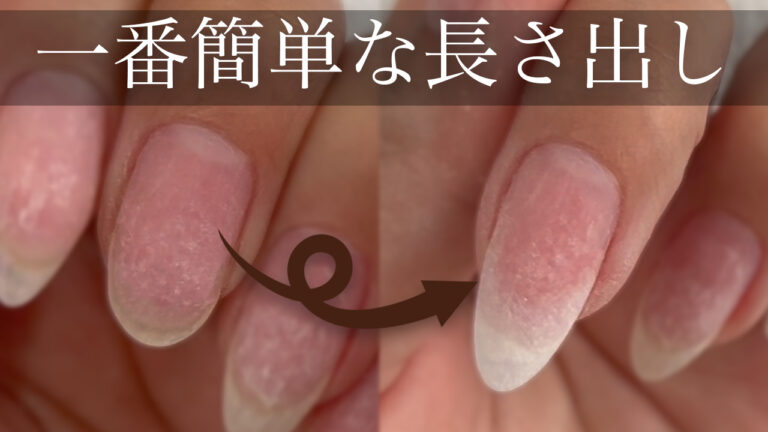
How to lengthen using tips
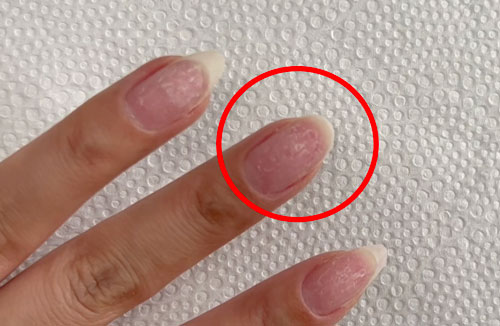
First, shorten the nails you want to lengthen to the very end.
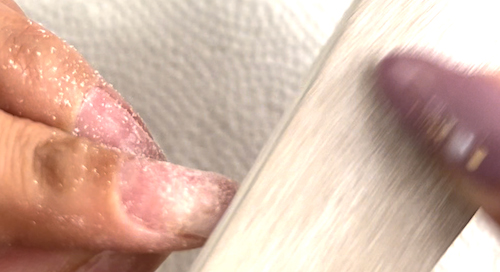
Scratch the surface with a nail file just enough to remove the gloss. Be careful not to shave too much.
Look at the size of the halfway tip. Choose one that fits the size of your nails. If there is no just right size, choose a larger one than a smaller one.
Please choose the size by looking from one end to the other.
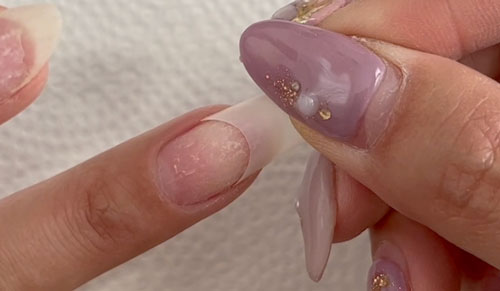
Once the size is determined, apply Activator to your nails.
Apply glue only to the part of the tip that will be in contact with your nails. Not too much, not too little.
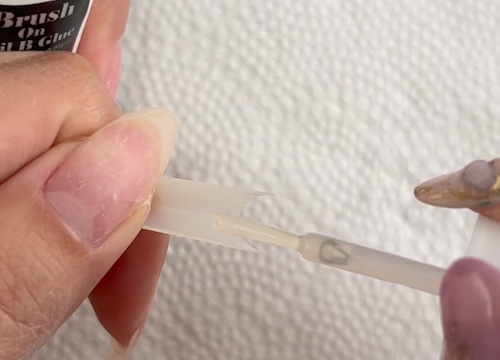
Holding the tip of the tip, slowly apply the glue starting from the tip of your own nails. Be careful not to let air in.
Wait until the glue hardens.
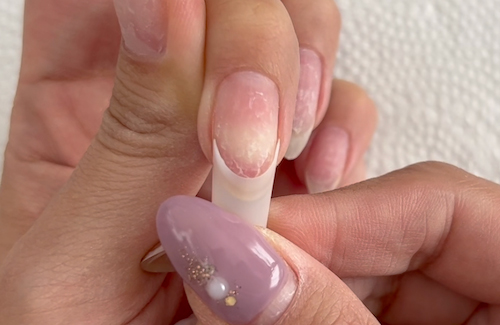
When the glue has hardened to a certain degree, attach the ends as well.
If there is not enough glue, you can add more from the top.
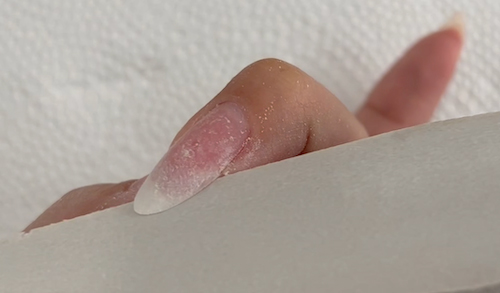
When the glue has completely hardened, shape the nails. Cut the length to some extent with nail clippers, etc., and then shave it with a nail file to shape it.

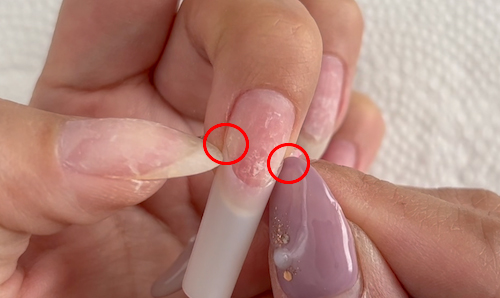
Shave off the surface of the nail to reduce the difference between the nail and the surface of your own nails. Be careful not to shave your own nails at this time. Be sure to shave only the tip portion.
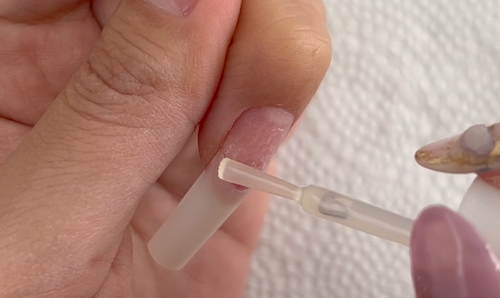
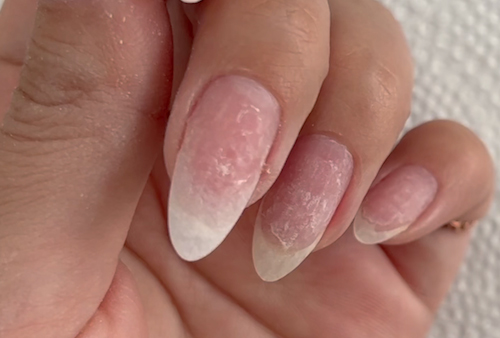
Finally, use a sponge buffer to trim the nail and you are done!
It looks natural and comfortable. Of course, you can put gel on top of this.
So here’s what it looks like with gel on top ⇓ It doesn’t look out of place at all!
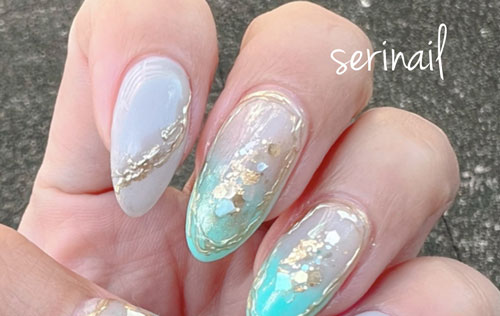
If you put gel on top, the strength (depending on the length) will be no problem.
Once you get used to it, it only takes about 5 minutes to lengthen each piece, so give it a try!
Check out the video to see how to lengthen the length.
YouTube shows how to do the lengthening we introduced in this article. Some parts are easier to understand on video, so check it out too!
If you find it useful, I hope you will click the Good button or subscribe to our channel.
*This page has been generated through an affiliate program.