The year 2022 has just begun, but nail salons are already starting to show Valentine’s Day nail designs.
So this time, I’ll show you how to make café latte nails that are easy to do on your own nails!
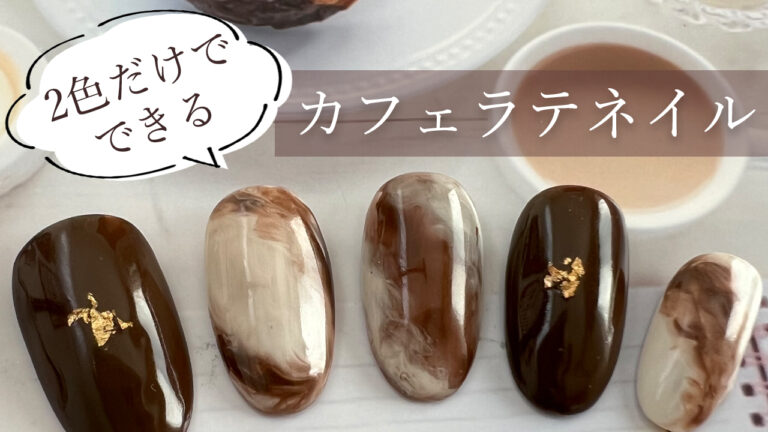
You only need two color gels. You only need two color gels, and it’s so easy and cute, so please give it a try!
*This blog is written by a manicurist in Japan. The information contained in this article is available in Japan. Please note that it may be different in other countries.
What is Cafelatte nails?
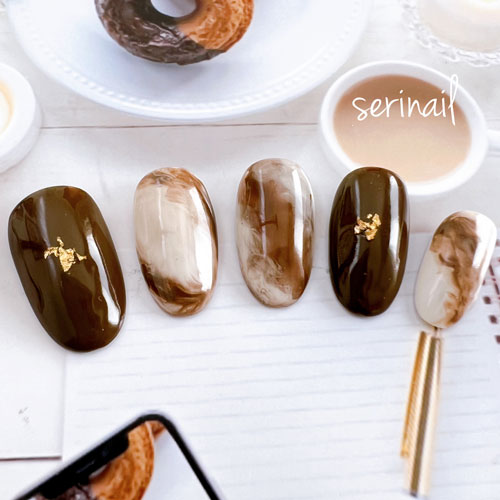
Cafe latte nail polish, as the name suggests, looks like a cafe latte. It is a marble nail that recreates the mixture of coffee and milk, giving it a warm feeling.
Every year during Valentine’s Day in February, café latte nails are just as popular as chocolate nails.
They’re also really easy to do yourself, so I highly recommend them for beginners! We’ll show you how to do it in detail, so please give it a try!
What you need for Cafelatte nails
All you need for latte nails are the following two color gels!
- Brown
- White
All you need now is a base gel and a top gel.
This time I used Celia’s gels “Dark Brown” and “White. If you’re looking for other cheap gel nails, I recommend this one, it’s cheap and good quality.

How to do Cafelatte Nails
Let’s take a look at how to do it.
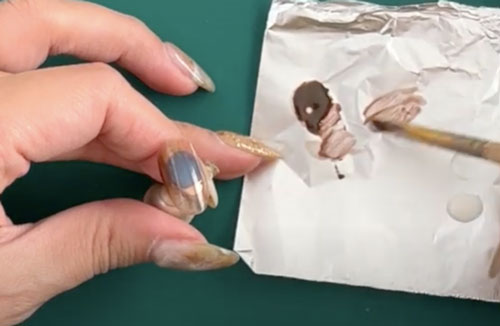
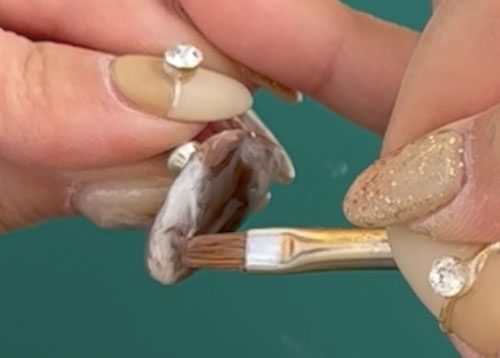
First, put the brown, white, and base gel (or clear gel) on a piece of aluminum foil.
Mix the brown with the base gel to make a transparent brown, and apply it.
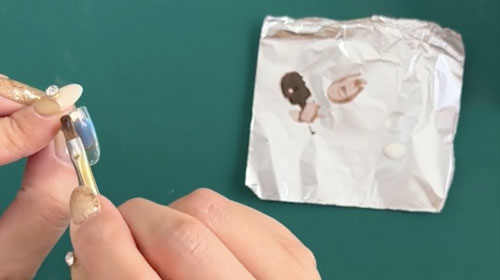
Apply some matte brown that is not mixed with the base gel to create an uneven look. Curing is done at this point.
Apply the transparent brown and matte brown again. Make the unevenness intentional.
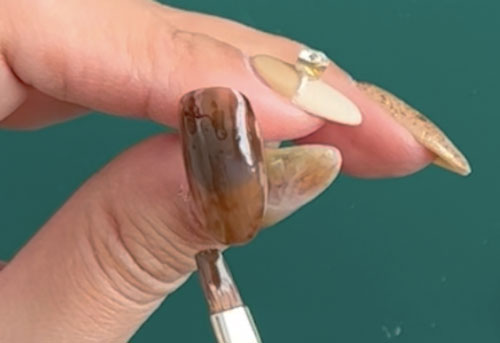
Then, without curing, mix the white with the base gel as well to make it transparent. Apply this white.
When I say “paint”, I mean “just put it on” without applying pressure. Shake the brush in small increments as you apply.
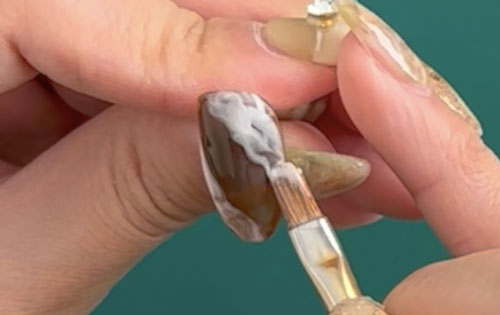
If brown sticks to the brush during the process, wipe it off with kitchen paper each time and put on white in a clean condition.
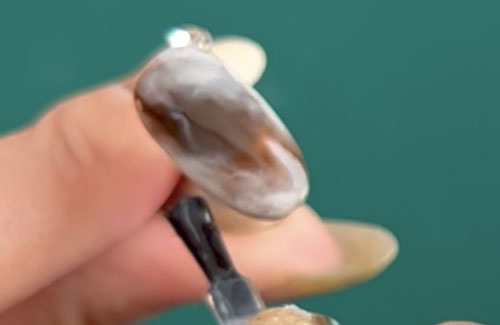
Use matte white as well to recreate a cafe latte. This is what it looks like just by adding white. Pretty handsome.
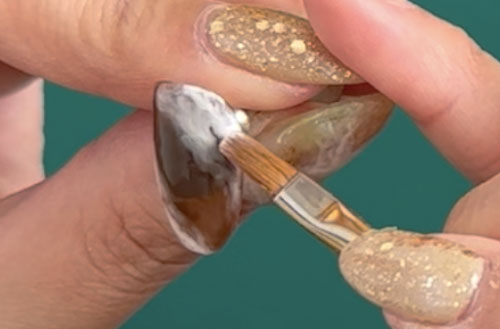
If the border between the brown and white is noticeable, try applying base gel to the border. As with the white, apply the base gel to the border of the brown and white.
This will make the border look blurred.When the latte look is achieved, cure the gel.
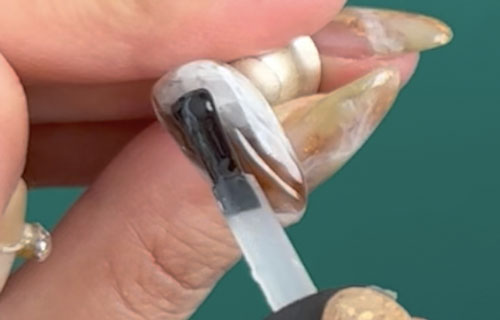
The surface is a little uneven, so fill in the unevenness with base gel and cure.
Finally, apply the top gel and you’re done! It’s so easy, isn’t it?
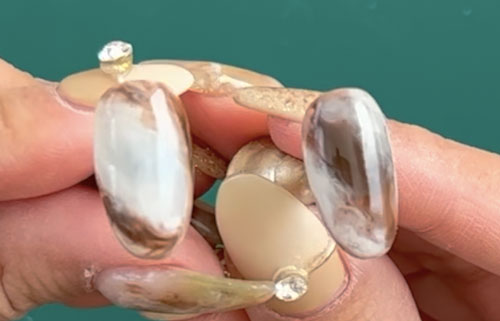
You can also reverse the process by using brown and white (the version on the left is reversed).
The process is also available as a video on YouTube⇓ You may be able to get a better idea of how to use the brush, etc. if you watch the video, so please check it out!
*This page has been generated through an affiliate program.