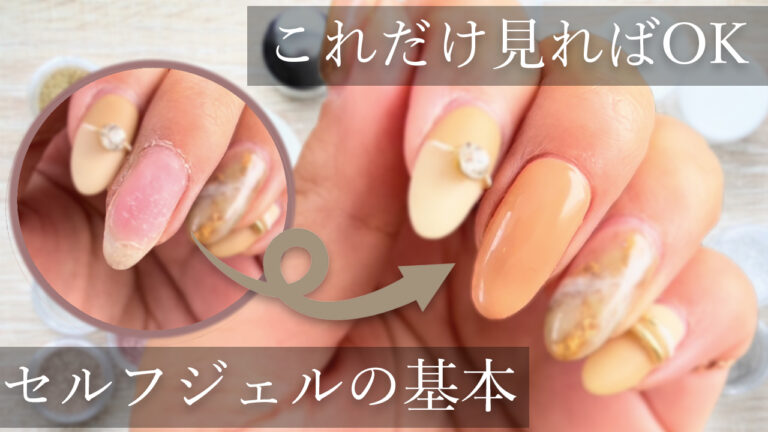
If you are a beginner nail artist and have come to this page to try your hand at doing your own nails, here you will find the basic steps and tips for self-gel nails, as well as the nail tools you need for self-nail care.
If you don’t know where to start, don’t worry. If you don’t know where to start, don’t worry, our certified manicurists will explain it in an easy-to-understand manner, so please take a look until the end!
*This blog is written by a manicurist in Japan. The information contained in this article is available in Japan. Please note that it may be different in other countries.
Tools needed for self-gel nails
First, let’s take a look at the tools you’ll need for self-gel nails. All you need is this and you can start doing your own nails right away!
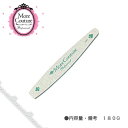
nail files
A file is a file that is used to trim nails. It is also used to trim the length and shape of nails, and in some cases, to scrape the surface of nails.
There are many types, but the most convenient one is the one with a coarseness of 180.
As they are consumables, you can have as many files as you want, but for now, just have one.
sponge buffer
A sponge buffer is a finer version of a file. When you use a file to shorten your nails, the shaved area will become fluffy, so use a sponge buffer to polish it and make it smooth.
Using a sponge buffer is absolutely necessary because it will change the finish and how long your nails will last if you don’t use it! A bottle of this is all you need.
wood stick
Wood sticks, as the name suggests, are wooden sticks that are used to push up the cuticles and remove overflowing gel in order to get a beautiful finish on gel nails.
They come in sets of several sticks, and you can buy them at 100-yen stores.
Cotton
Wrap it around a wood stick and use it. You can use whatever you use for makeup.
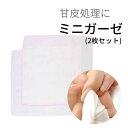
gauze
This is used to prepare the cuticle. The difference in the treatment of the cuticles can make all the difference in the finish of your gel nails and how well they hold up, so be sure to have some gauze handy!
paper towel
It is used for applying gel.
Pre-Primer
The pre-primer removes moisture and oil from the nails. If you put gel on your nails with moisture or oil left on them, the gel nails will not hold up well.
We recommend that you prepare a pre-primer if possible, but if you have to, you can use ethanol sold at drugstores instead.
However, disinfecting ethanol is not suitable as a substitute for pre-primer because of its high water content.
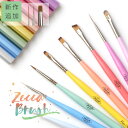
Brush for gel nails
This is a brush for applying gel nails. There are many types of brushes and many people don’t know which one to choose, but first, buy the square type.
The square type is a basic brush and is used for applying base gel, color gel, and top gel. If you want to draw art by hand, there are other types of brushes that are more suitable, but you can start with just the square type.
However, be sure to buy a brush with a cap.
Gel hardens in sunlight, so if you leave the brush with gel on it, the brush will harden. Be sure to wipe off the gel with kitchen paper after use and put the cap on.
UV/LED light
LED lights are necessary for hardening gel nails. There are many types of these out there.
- One that has both UV and LED
- 36W or more
We recommend a light that meets the following two requirements.
This is because some gel nails are cured by UV and some by LED, and there is a phenomenon that “UV-curable gel does not cure by LED” and “LED-curable gel does not cure by UV”.
Also, the lower the wattage number, the longer it takes to cure, so 36W or more is convenient for you.

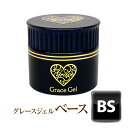
base gel
Base gel is the base coat for nail polish. It makes gel nails last longer and prevents color gels from migrating to the nails.
The base gel determines how long your gel nails will last, so it is important to choose the right product.
I recommend Grace Gel. It is affordable and not difficult to handle, while being of a quality used by professional manicurists. I use it myself.
color gel
Color gels range from pin to pin, but it is important to match them with the base gel.
The best way to be sure is to use the same brand of base gel and color gel. Grace Gel, which I mentioned earlier, sells a wide variety of color gels, so you can use them.
By the way, in my experience, the 1 dollor shop “Seria” gel nails were not bad with Grace Gel. Also, the petite gel nail polish had no problem holding up well.

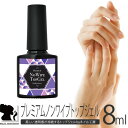
Non-wiping top gel
The last one is a non-wiping top gel. This is the top coat in nail polish.
Most types of gel leave uncured gel on the surface after curing, but the “non-wipe” type leaves no uncured gel.
However, “non-wipe” gel does not leave any uncured gel on the surface. If you finish with non-wipe top gel, you don’t need to wipe off the uncured gel and you don’t need any tools, so non-wipe type is recommended.
List of things you will need
These are the things you need for self-gel nails, but the tools I’ve mentioned are only for beginners.
Some of the other self-nail articles and videos on the Internet show professional tools used by professional manicurists, but they are not suitable for beginners to start with because they are difficult to use and can lead to injuries if used incorrectly.
When you get used to doing your own nails, you can buy new tools, so don’t feel like you have to get everything right from the start! You don’t have to think that you have to have everything from the beginning.
Finally, here’s a list of tools, their prices (as of this writing), examples of where to buy them, and links to where you can find them⇓
| tool-name | price | Where to buy |
| nail files | 290yen(+Postage 200yen) | rakuten |
| sponge buffer | 550yen(+Postage 360yen) | rakuten |
| wood stick | 151yen | rakuten |
| cotton | 110yen | 1 dollor shop |
| gauze | 440yen | rakuten |
| paper towel | 110yen | 1 dollor shop |
| pre-primer | 1,700yen | rakuten |
| Brush for gel nails | 398yen | rakuten |
| UV/LED light | 2,850yen | rakuten |
| base gel | 1,320yen(+Postage 500yen) | rakuten |
| color gel | 275yen | rakuten |
| Non-wiping top gel | 777yen | rakuten |
The total cost for all of the products introduced here was 8,971 yen! Even with shipping, the total cost was 10,031 yen, a little over 10,000 yen.
Now that you know what you need, let’s take a look at the steps to do self-gel nails!
Self-Gel Nail Procedures
Learn the steps, basics and tips for self-gel nails.
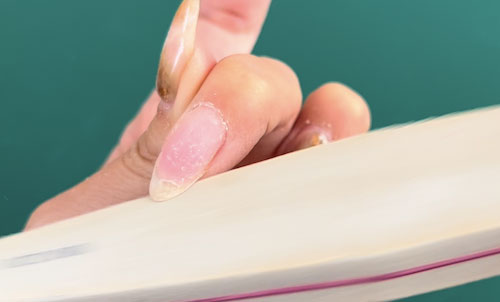
Shape your nails.
Shape your nails. Use a file to get the shape and length you want.
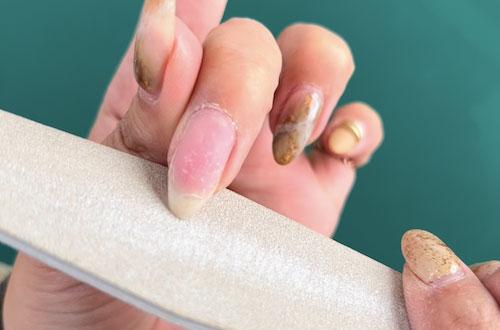
After shaping, use the sponge buffer to smooth out the shaved areas. The sponge buffer also scrapes the nails, so be careful not to destroy the shape you’ve created with the file.
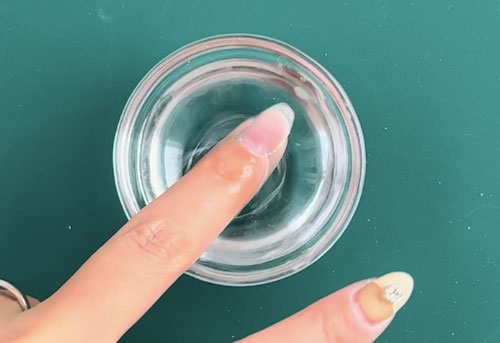
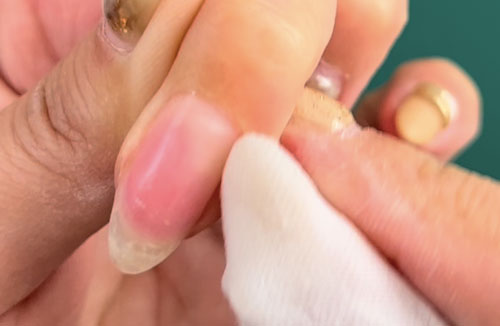
Push up the cuticle.
First, soak your hands in hot water to blister the sweet skin. You can do this while taking a bath.
After it is fully softened, wrap a cotton ball around a wood stick, soak the cotton ball in water, and then
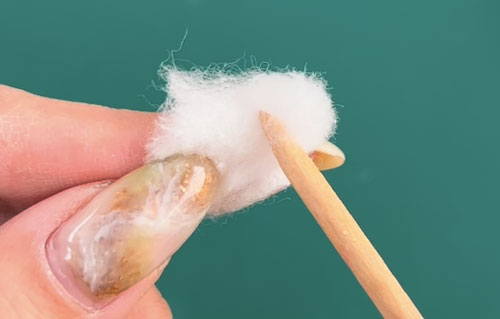
Gently push up the cuticle.
Sometimes the cuticle is stuck on the surface of the nail, so push it up all over so you don’t miss it.
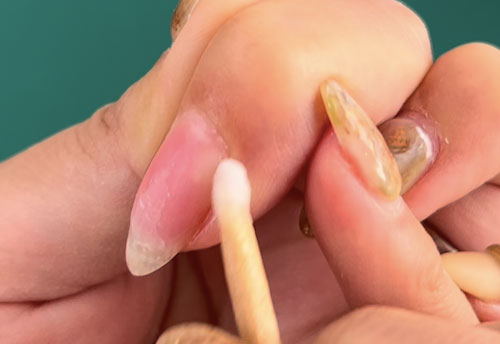
Do a gauze clean.
After pushing up the cuticle, wrap gauze around the thumb of your dominant hand and wet the tip with water.
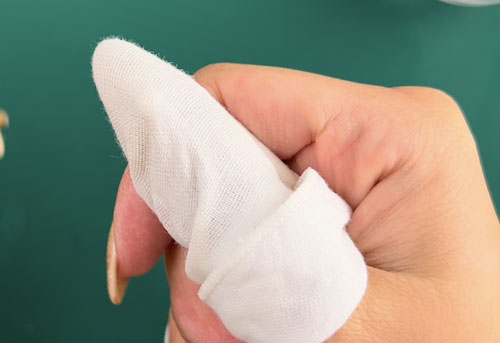
Rub the area around the cuticle with force.
The image is to clean up the surface of the nail so that there is no residue of the spoiled skin pushed up by the wood stick. That’s all it took to get them pretty clean!
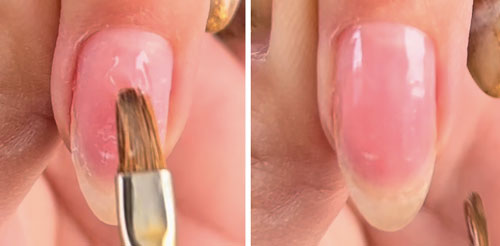
Apply pre-primer.
Apply pre-primer to the nail surface to remove moisture and oil.
*Sanding (scratching the surface of the nail with a file) is necessary for some types of base gel, but it is not necessary for the Grace Gel introduced in this article, so sanding is omitted here.
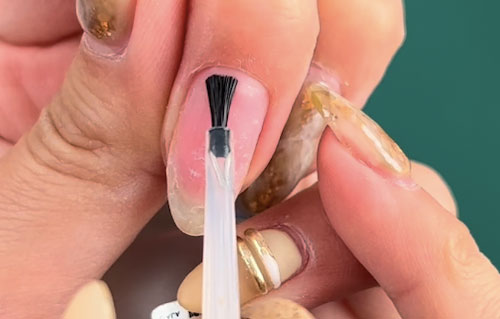
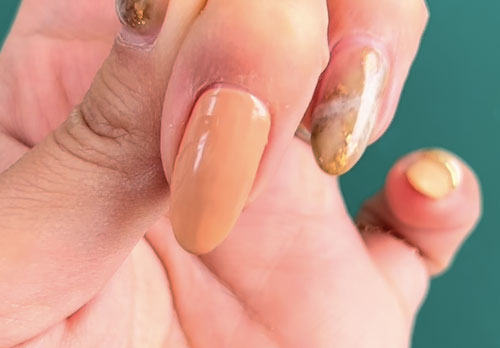
Apply base gel.
Apply the base gel.
Apply it to the entire nail. Do not apply too much, just enough to cover the surface of the nail with gel.
You should also paint the tips (edges) of your nails. Painting here will make the gel last longer.
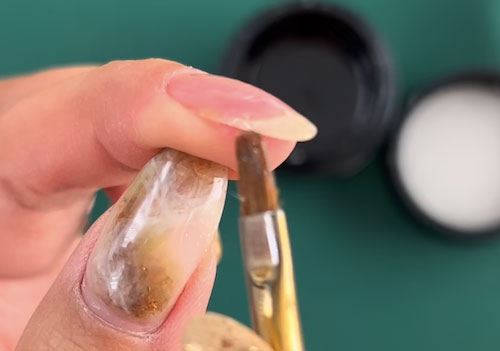
If you get gel on your fingers, remove it with a wood stick.
After applying the gel, cure it with a light for 30 seconds*.
*The curing time varies depending on the type of gel.
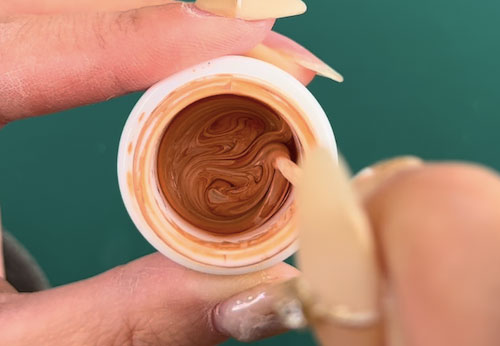
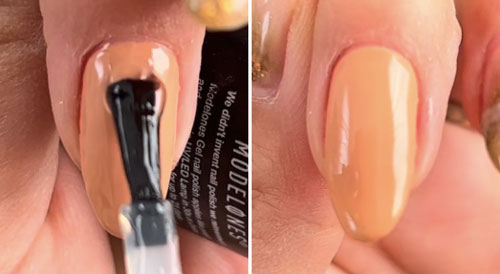
Apply color gels.
Apply the color gel.
Depending on the type of color gel, stirring (mixing the separated gels) is necessary. If stirring is necessary, please use a toothpick to mix the gel in a figure-eight motion.
As with the base gel, apply to the entire nail. Do not apply too much pressure and do not apply it unevenly.
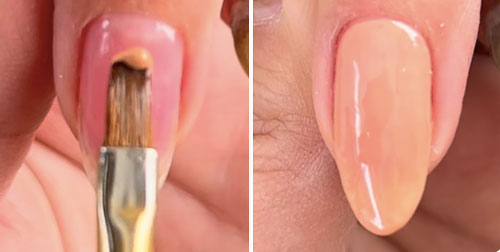
Once coated, cure for 30 seconds*.
Apply two coats. Apply a little more gel than the first coat for a beautiful finish.
Don’t forget to paint the edges of both the first and second coats.
Cure for 30 seconds*.
*The curing time varies depending on the type of gel applied.
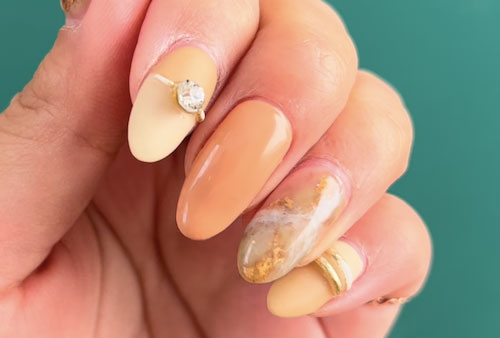
Apply non-wiping top gel.
Finally, apply the non-wiping top gel.
Trun! Let’s finish it off. Don’t forget to paint the edges here too!
Cure for 30 seconds*.
Now you’re done!
*The curing time varies depending on the type of gel, so change the curing time depending on the gel you have applied.
The above is the basic procedure for self-gel nails.
If you want to add art, it depends on the type of art. For example, if you want to add stones or stickers, add them after applying two coats of color gel, and finish with a non-wiping top gel on top.
The key to a beautiful finish is…
Here are some tips on how to make your self-gel nails beautiful. These are also tips to make them last longer, so please check them out.
Push up the endocarp properly.
Make sure to push up the sweet skin properly, even if it is attached to the skin, and clean it with gauze.
If the cuticle is left behind, the gel will not adhere well and will not last long.
No irregularities
Be sure to apply the color gel evenly. If the first coat is uneven, the second coat will also be uneven.
Also, if the first coat of base gel is uneven, the color gel will also tend to be uneven, so be sure to start with the base gel and apply it evenly.
Don’t put on too much gel.
It is not advisable to put on too much gel in order to eliminate unevenness.
If too much gel is applied, it will not harden completely and the gel will become uneven. Be careful not to put too much gel, as it will not hold well.
Apply the gel along the line of the cuticle.
It is also important to apply the gel along the cuticle line.
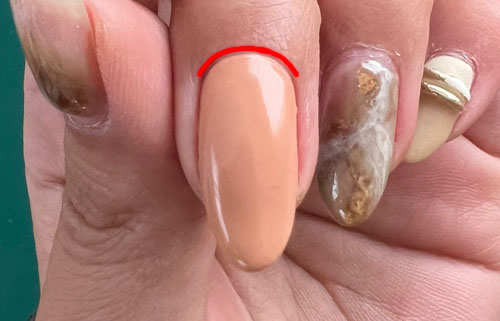
If this cuticle line is messy, the finish will not look good. Use a wood stick to remove any protruding parts and apply along the cuticle line.
Minimize gaps between cuticle line and sideline.
It is also important to avoid gaps between the cuticle line and the sideline (the side part of the nail) as much as possible. Try to paint with as few gaps as possible.
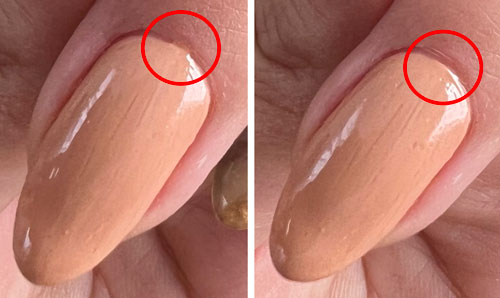
Do not put gel on the skin.
If you try to apply gel without gaps, it is easy for the gel to get on the skin.
If you harden the gel while it is still on the skin, not only will the finish not be as beautiful, but it will not last as long, so be sure to remove it with a wood stick.
Check out the video for instructions.
The self-gel nailing procedure described in this article is also available in video format.
There are some parts that are easier to understand on video, such as how to use the brush and how much gel to apply, so be sure to check this out too!
Have fun doing your own nails!
Even professional nail artists start out as beginners. The more you practice, the more your skills will improve.
First of all, the basics are important, so please try your hand at self-nail painting, paying attention to the procedures and tips introduced in this article!
*This page has been generated through an affiliate program.