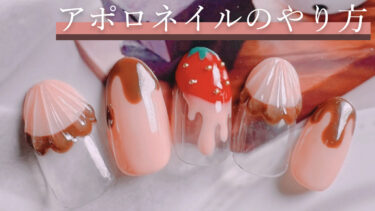
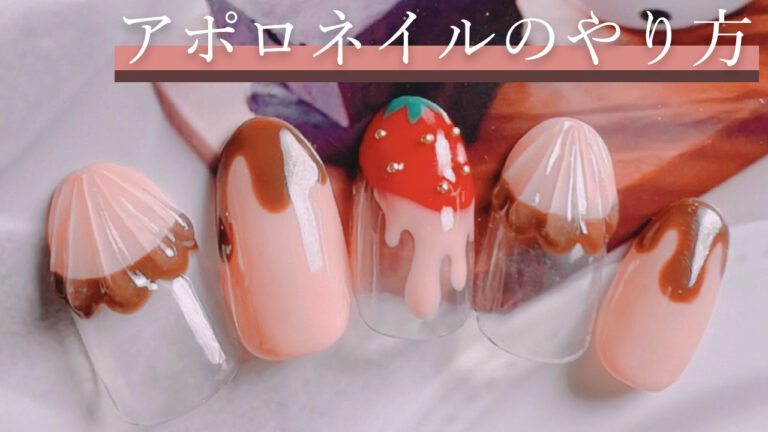
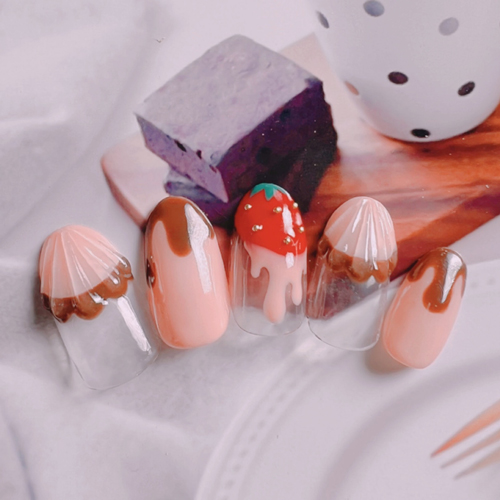
When Valentine’s Day approaches, chocolate nails become popular, and one of the most popular is the “Apollo nail”.
One of the most popular is the “Apollo nail”, which is based on the Meiji chocolate candy “Apollo”.
In this article, I’ll show you how to do these Apollo nails!
*This blog is written by a manicurist in Japan. The information contained in this article is available in Japan. Please note that it may be different in other countries.
What you need for Apollo nails
For Apollo nails, you will need the following tools.
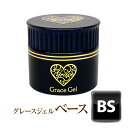
Base gel
You can use any kind of base gel, but it is better to use a good one because it will affect how long the gel nails last.
I recommend Grace Gel because of its high quality and reasonable price.
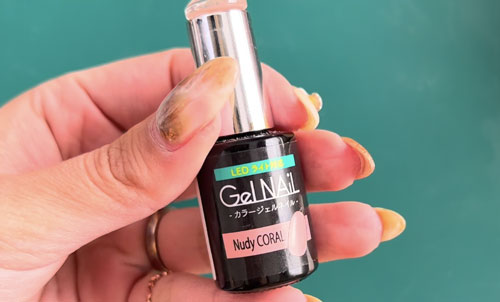
Color gel (pink)
You can use any color gel you like, but this time I used Seria’s Nudy Coral.
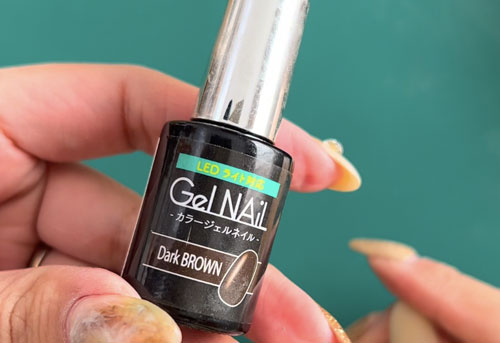
Colored gel (brown)
You can use any brown gel you like, but this time I used Seria’s Dark Brown.
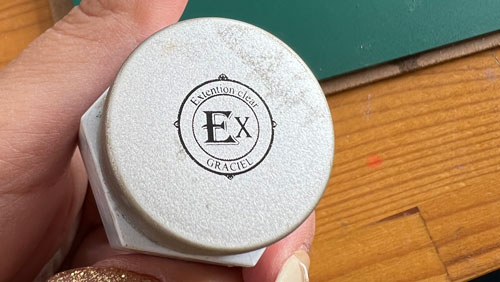
Hard clear gel
Harder clear gel is necessary to make Apollo nails look 3D. Icing gel and bejeweled gel are too hard and not suitable.
This time I used GRACIEL’s extension clear, but it seems to be discontinued now. It seems to have been discontinued….
Gels for lengthening (extension gels, builder gels, etc.) are harder than regular base gels, so you can use such gels.
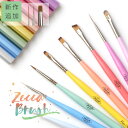
Thin brush
A brush for applying clear gel. A thick brush is difficult to use, so a thin brush is recommended.
This time I used the following short liner. It’s easy to use.
Non-wiping top gel
You can use whatever you have.
How to Do Apollo Nails
Now let’s see how to do Apollo nails!
Apply the base gel
Apply the base gel and let it harden.
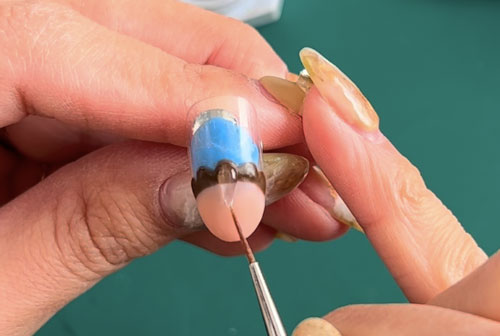
Apply pink color to the tips.
Apply pink color gel to the tip of the nail. Make sure to paint in a slightly curved shape.
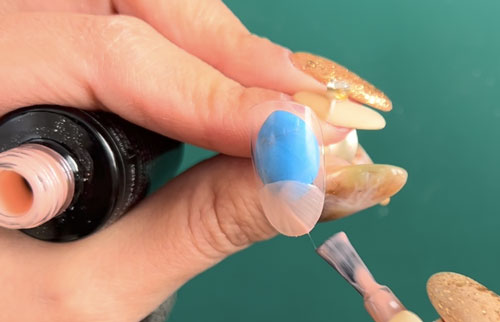
Cure and apply two coats.
Cure.
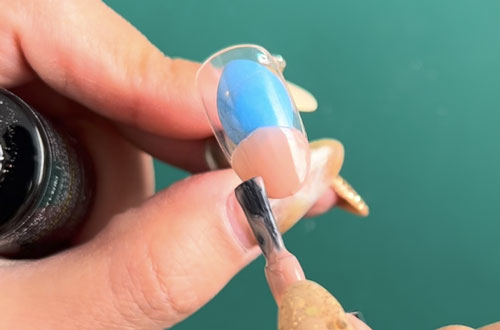
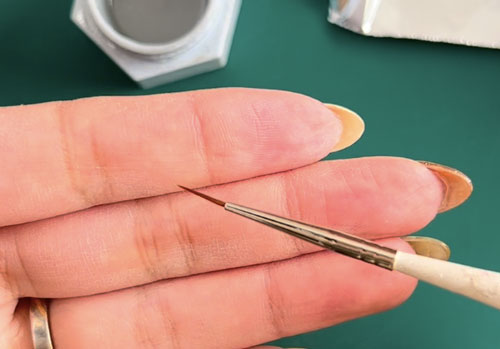
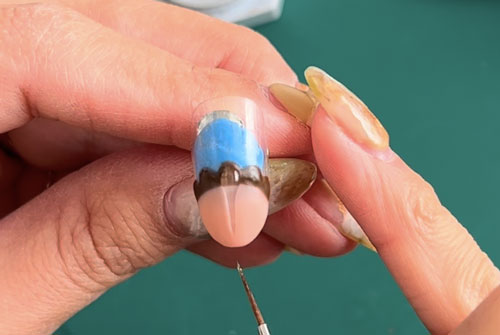
Paint the border with brown.
Next, apply the brown color gel. Instead of applying it straight, apply it in a bumpy, flower-like shape.
Curing → two coats → curing.
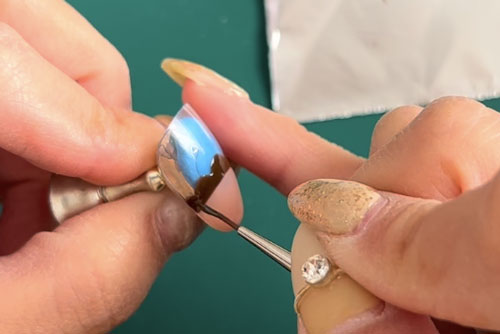
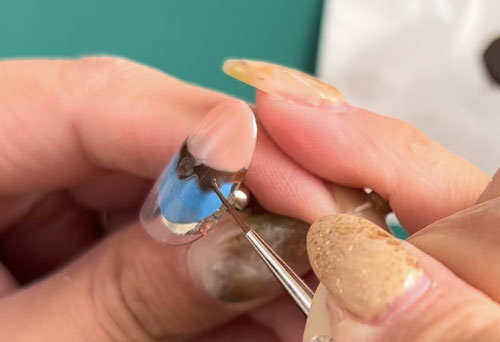
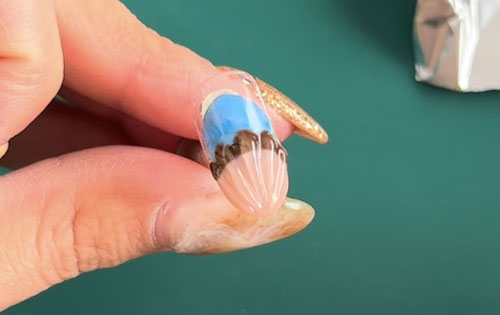
Put a hard clear gel on top.
Apply a hard clear gel. Take a large amount of gel and put it on the brush in a round shape.


Wipe the brush with kitchen paper to make it clean.
After the gel has become a beautiful circle, stretch the tip of the brush downward so that it becomes thinner toward the tip.
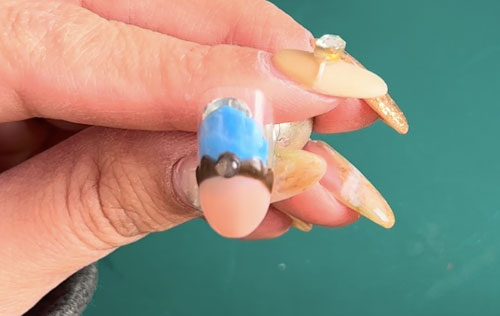
Be careful not to stick the gel next to each other. If you are worried, you can harden the gel after each application.
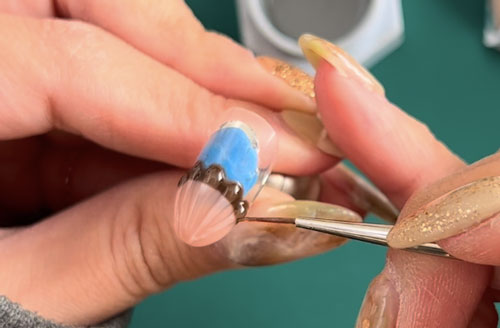
When you have finished placing the gels, let them harden.
Apply non-wiping top gel.
Finally, apply the non-wiping top gel and you’re done!
Click here for video
The Apollo nail technique is also available on YouTube. I think it’s easier to understand how to put the gel on the nails, so please check this out too!
Apollo Nails for Valentine’s Day
Apollo nails look like they’re about to start smelling sweet. It’s very girly and cute, so why not try it for Valentine’s Day?
*This page has been generated through an affiliate program.